Manage the lead process, change stage and status to stay updated with the most recent action on your student record
Overview
Application Wizard is the process to create an application. It is a 4- step process, where the user creates all the necessary entity and complete the application. There are other ways to create an application too, like from the student page. But it will lead to the same steps and process.
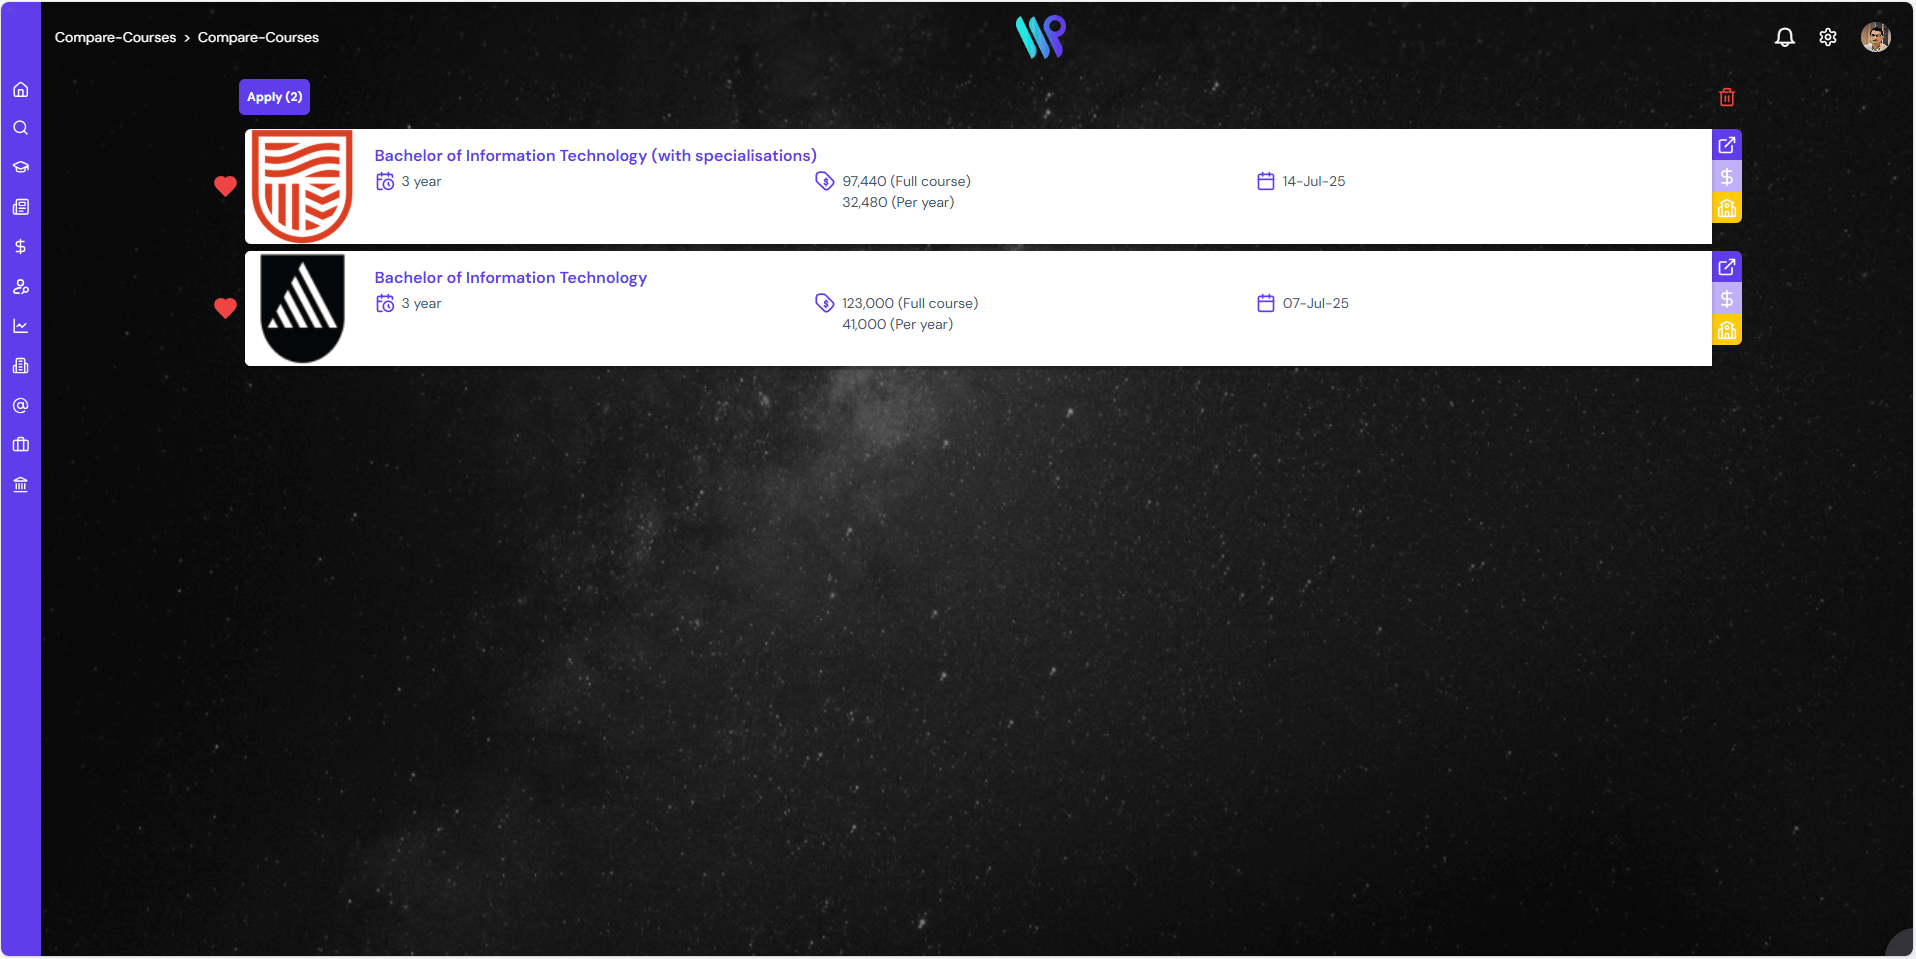
One can directly enter the wizard by clicking on the ‘Apply’ button on the course search results page. In this example we are applying at two different institutions.
Once the Wizard opens follow the step as guided below
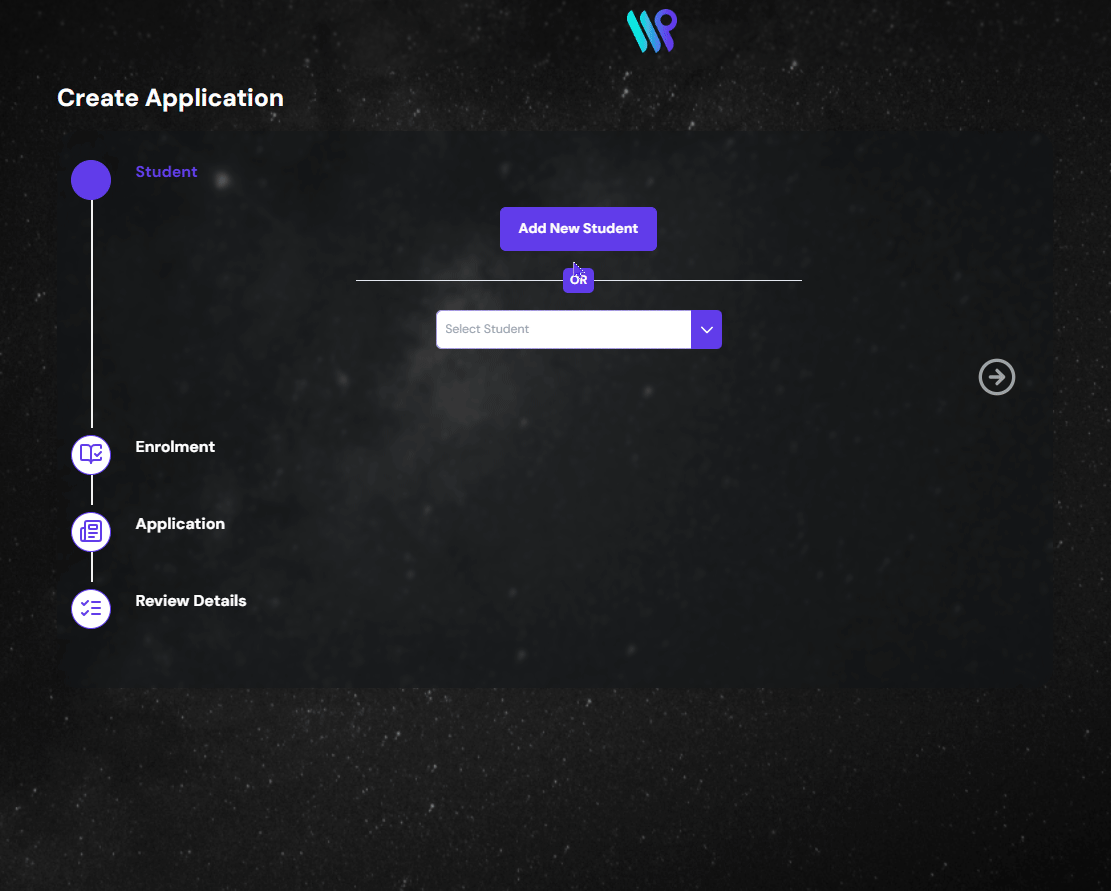
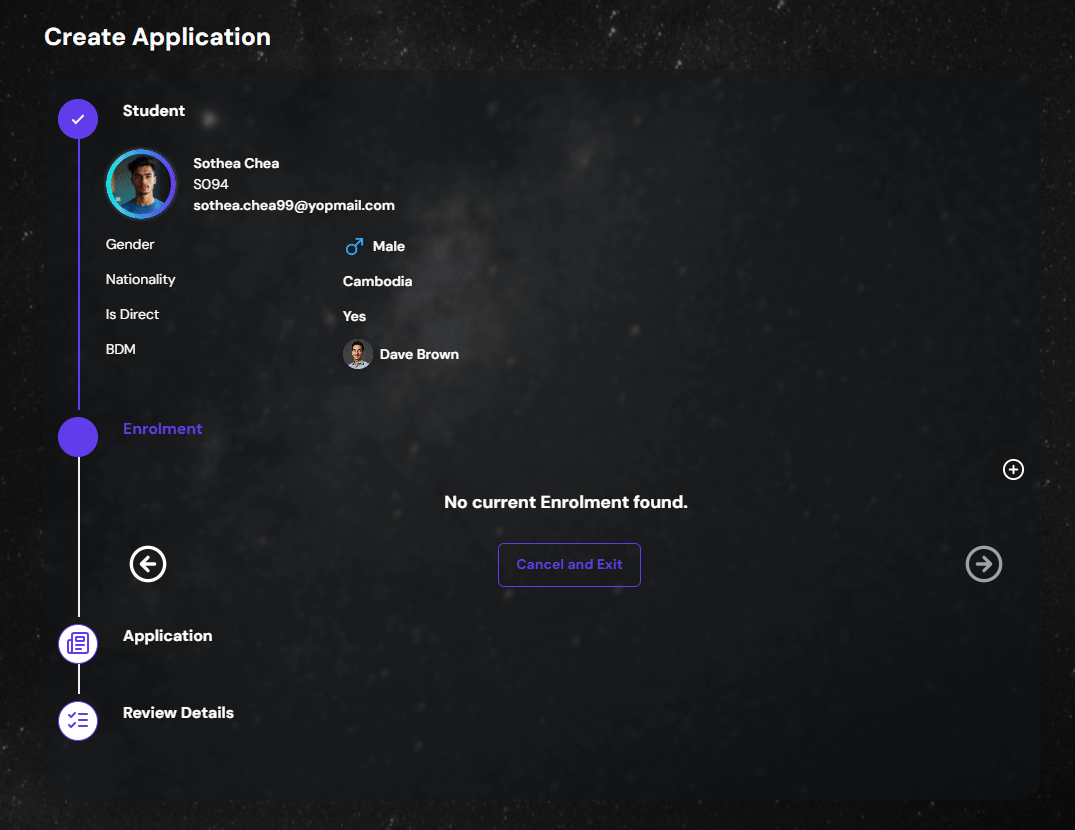
Student
The first step of the process is to create a new student or select existing student.
Adding a Student
This step is creating a new student record completely. Click on ‘Add a New Student’ button to open up a Create Student Form. Besides creating a student manually, here you can:
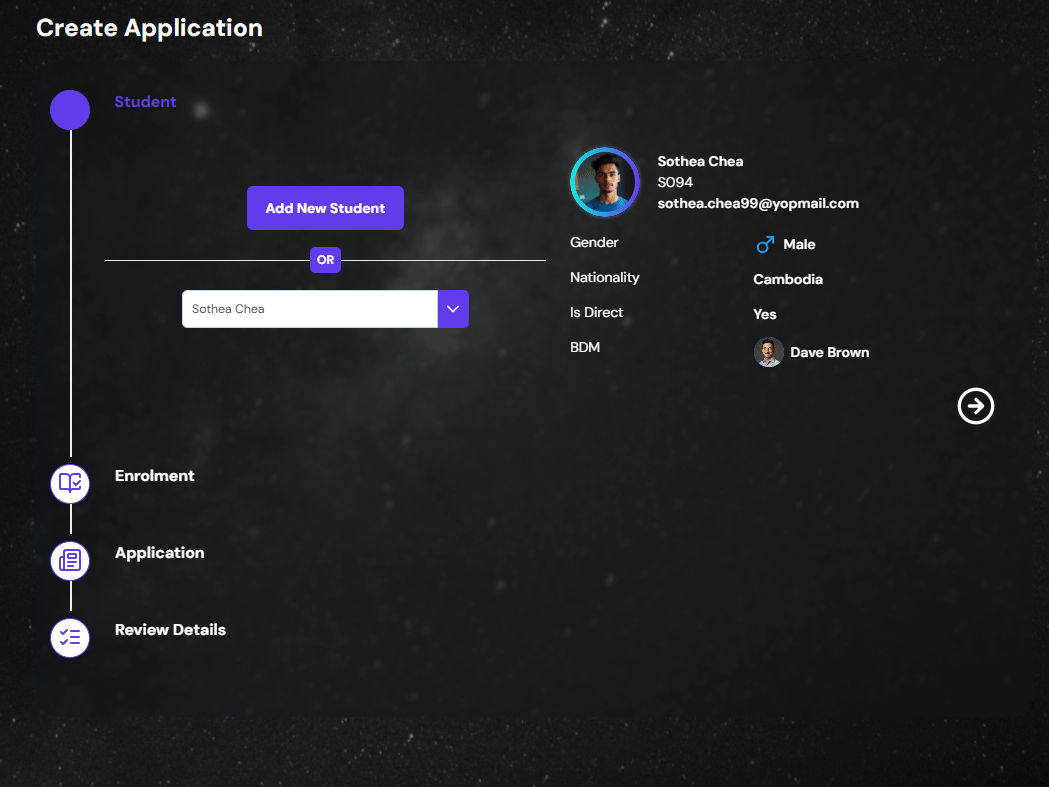
As we are starting an application under a student, if the student record already exists, we can select that student and use the same record. Click on the dropdown or type the name or ID of the student to select the student.
Once the student is selected, a preview of the student will appear on the right side. Make sure that you have selected the right student.
Click on the next arrow button to move into the next step which is creating Enrolment.
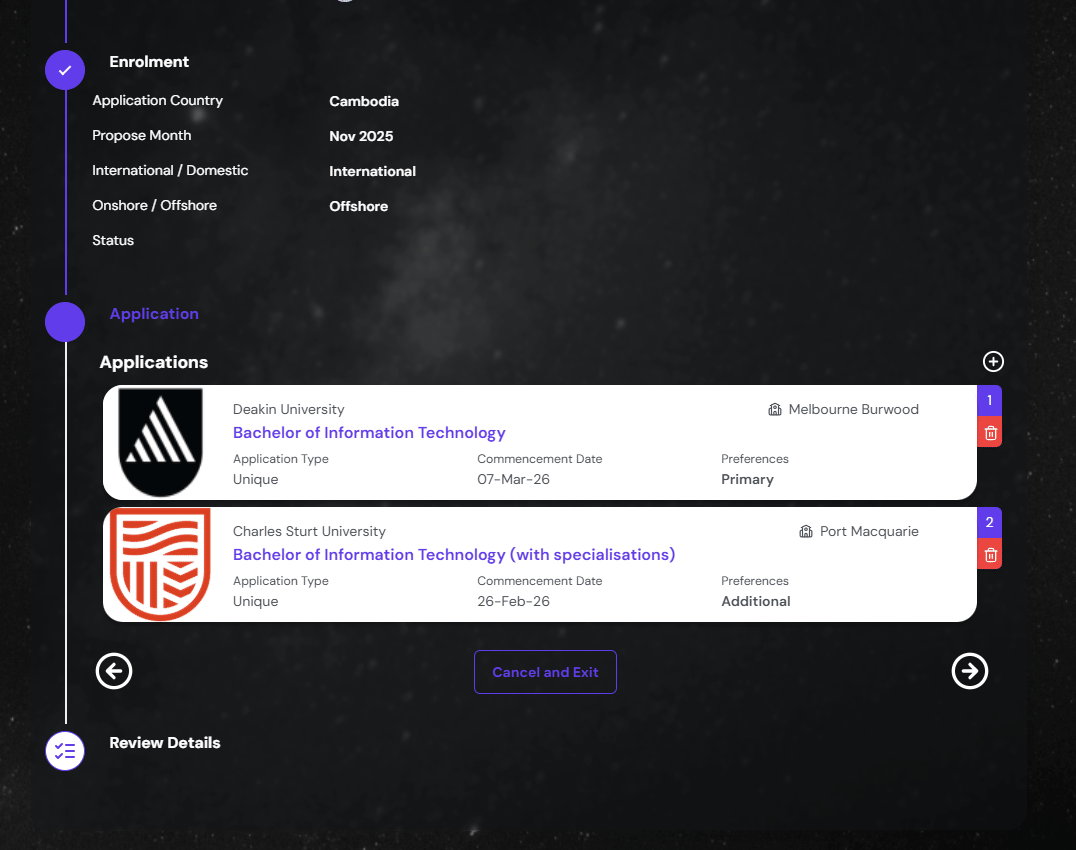
Enrolment
Enrolment is the opportunity the student brings to the company. In order to cash this opportunity, the student is given multiple options which is the application. Only one enrolment can exist at a given time. Addition of any application will be under the same enrolment.
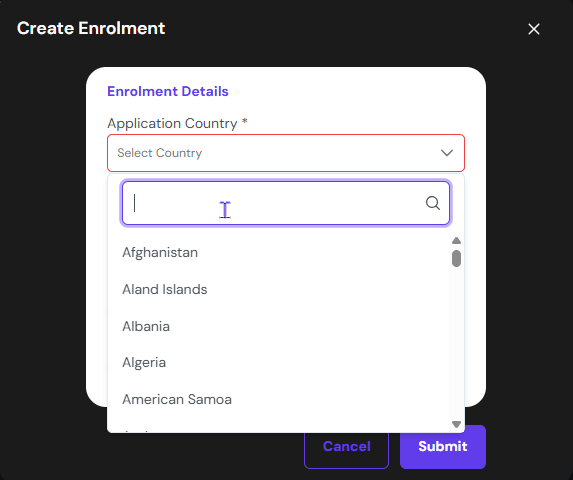
Create an Enrolment
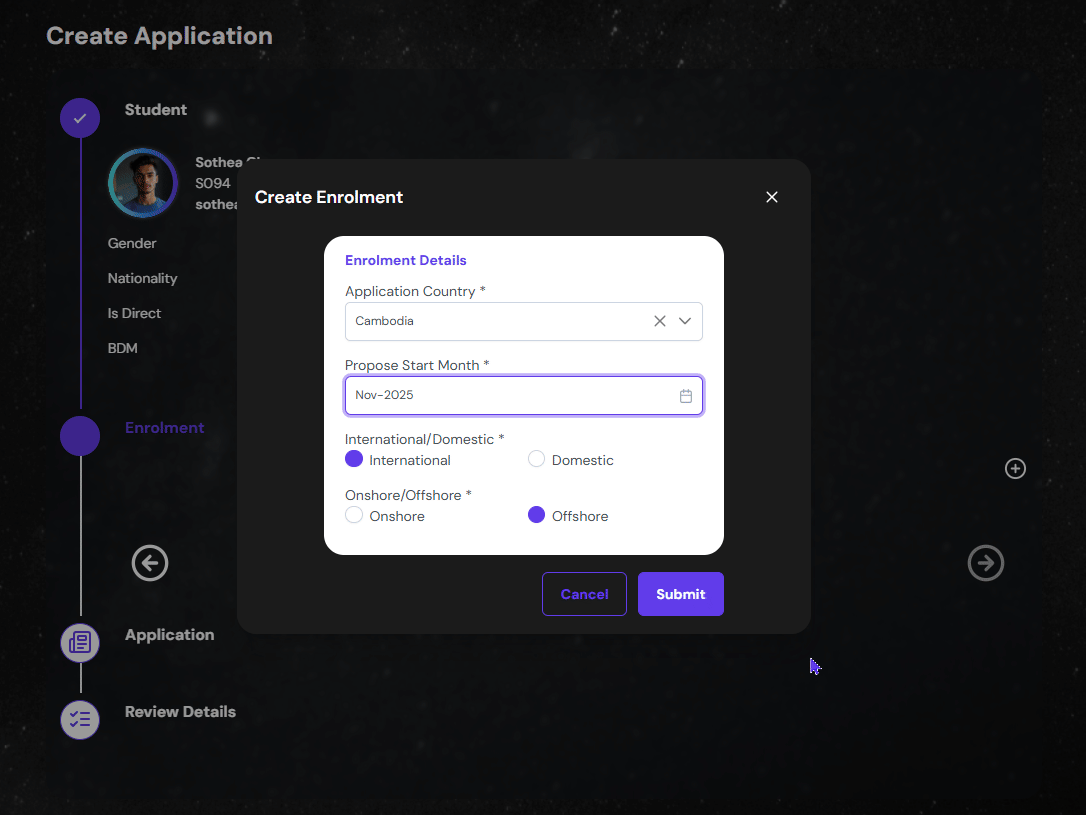
As this is a starting of a completely new application, no ‘+’ icon, Add New Enrolment button, to add an Enrolment. A pop-up window appears after clicking.
On the pop-up window, you will input:
Application Country: Where the student is applying from or current location of the student, not the nationality.
Proposed Start Month: When is the student planning to start the course.
if the student is International / Domestic student
And, if the student is Onshore or Offshore student.
Based on the application country, the bottom two fields will be auto selected.
Once things are confirmed, you can click on Submit button to create the enrolment. You can go back to make changes, if need be. If ready to move ahead, click on ‘Next’ arrow button.
Application
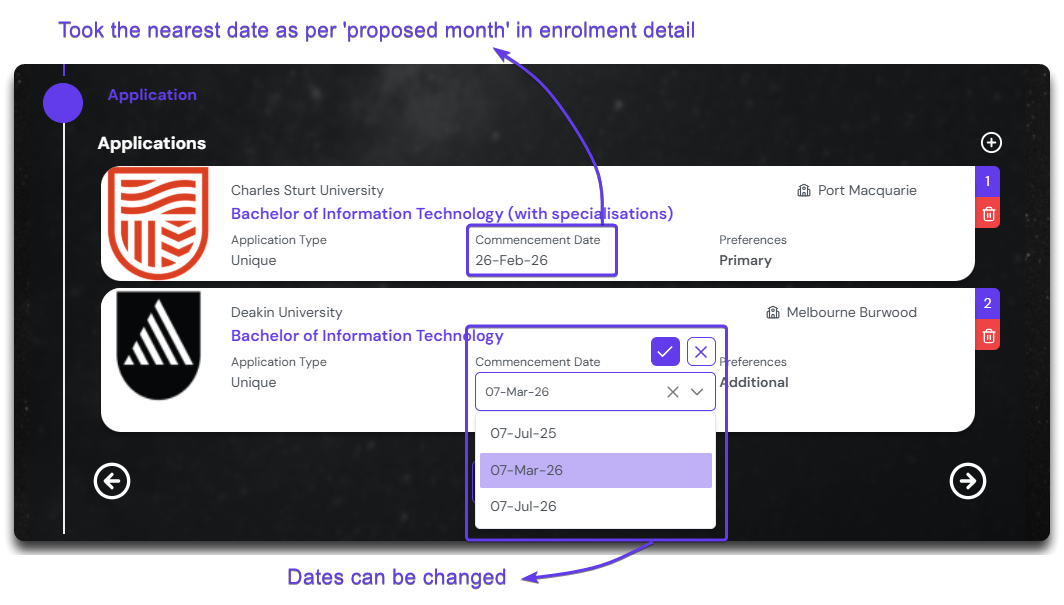
Applications are the option that we provide the student. There could be multiple applications a student might want to proceed with. However, those application are there to seize the same opportunity, thus it has to be inside the same enrolment.
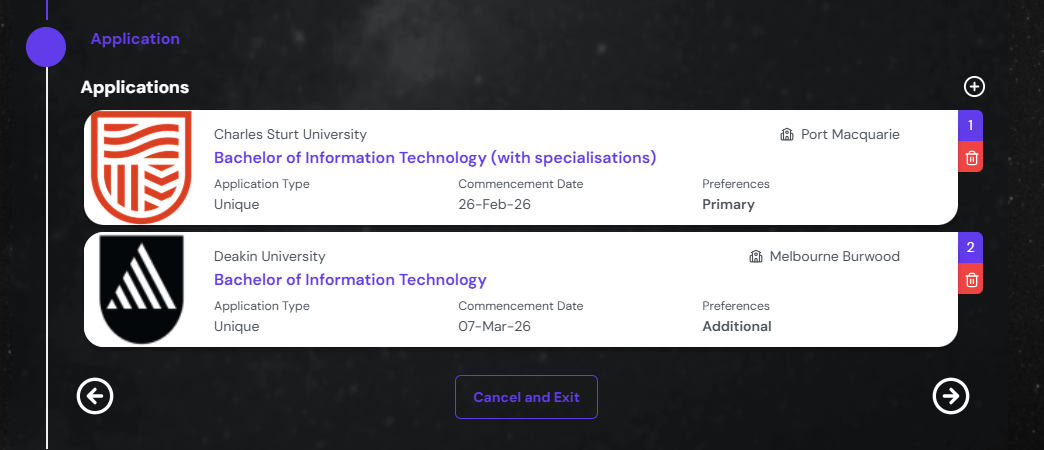
The two course at two different institutions are now carried forward by the system and is displayed as application. First thing to do here would be to select the Campus where the student is interested in studying.
You can change the commencement date here. The displayed commencement date is picked by the system as the nearest available future intake in relation to the date mentioned while creating enrolment. Click on it to select the new date.
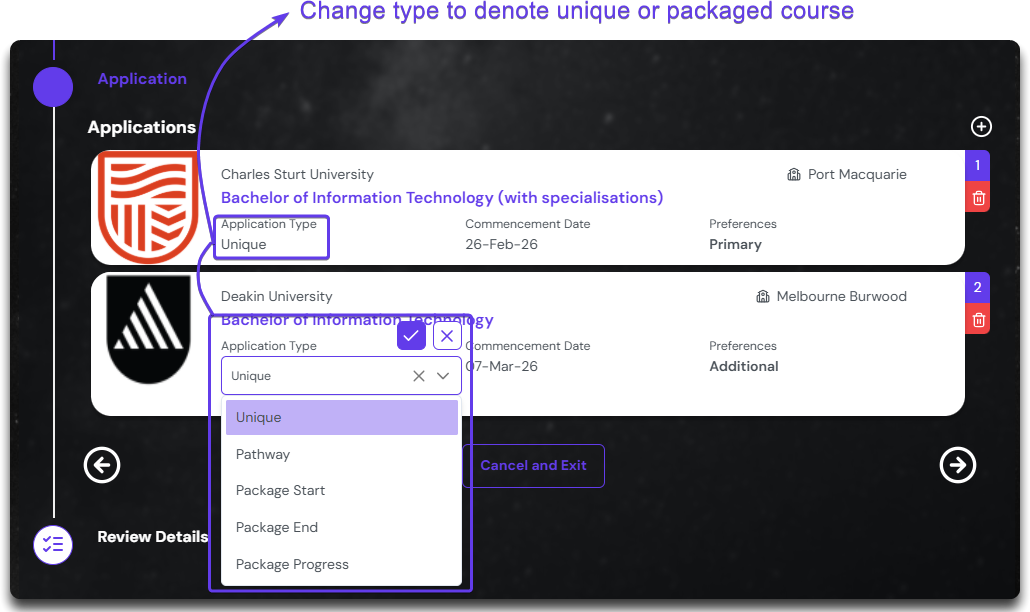
When multiple application exist, we should be able to distinguish if the application is packaged or independent. Here is how we can define it:
Unique: an independent application
Package Start: First part of the packaged application
Package Progress: Middle part of the packaged application with more than 2 courses.
Package End: Last part of the packaged application.
Pathway: If the course is a pathway leading to some other courses which is not in this enrolment.
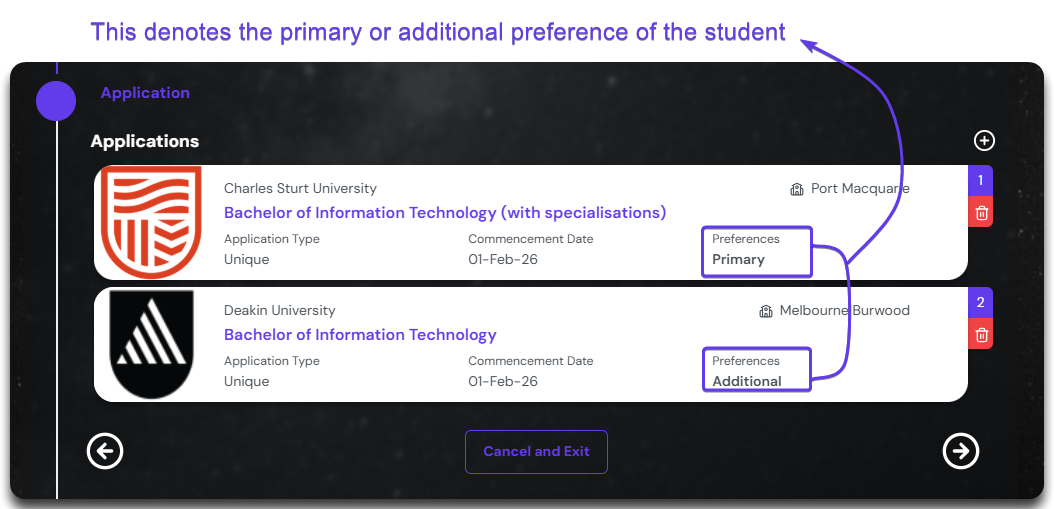
The other things that you can change here is the preference of the application. When applying for multiple courses, we can define what is the first priority or preference of the student. This is denoted by number at the top right corner. The first preference is also mentioned as Primary, and anything after that is Additional Preference.
The preference can be changed by swapping the courses by dragging it.
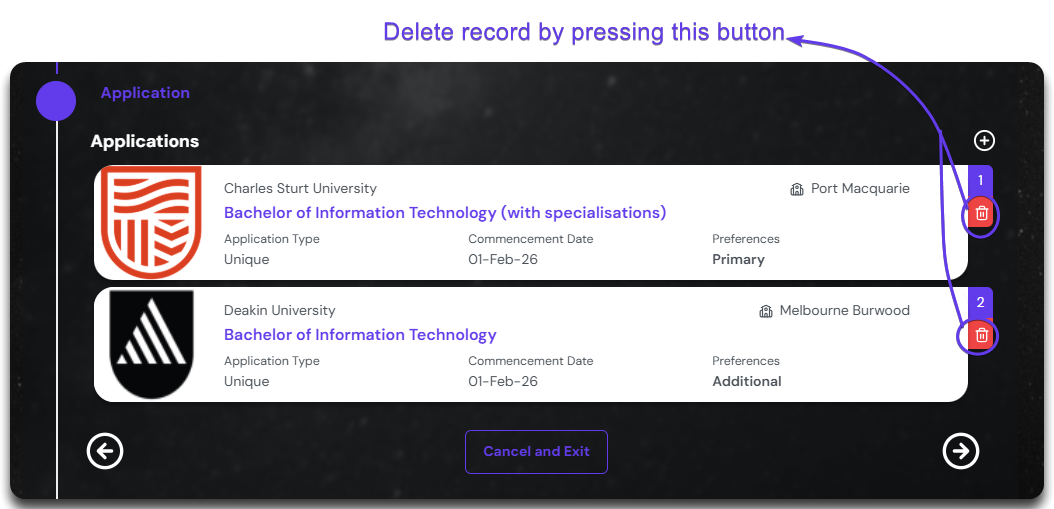
In case the application mentioned here is not the choice of the student, you can remove it by clicking on the delete button on the top right corner of each card.
Once all the fields are set and recorded, you can click on ‘Next’ arrow button to move to the ‘Review’ section.
Review
Once the process has come to an end, its time to review and submit.
Once the review is complete and you feel you can move forward, click on the submit button. They application will be created. You will be taken to the Enrolment Page where the application(s) will be visible.