Learn about how to read enrolments and manage the application within that enrolment of each student.
Enrolment Record Overview
Open an enrolment from the enrolment list view page to take action on the records, view its components and make the record up to date.
Click on the Enrolment ID on the list view to open up the Enrolment record. This will open on the default view with application pane on the right side.
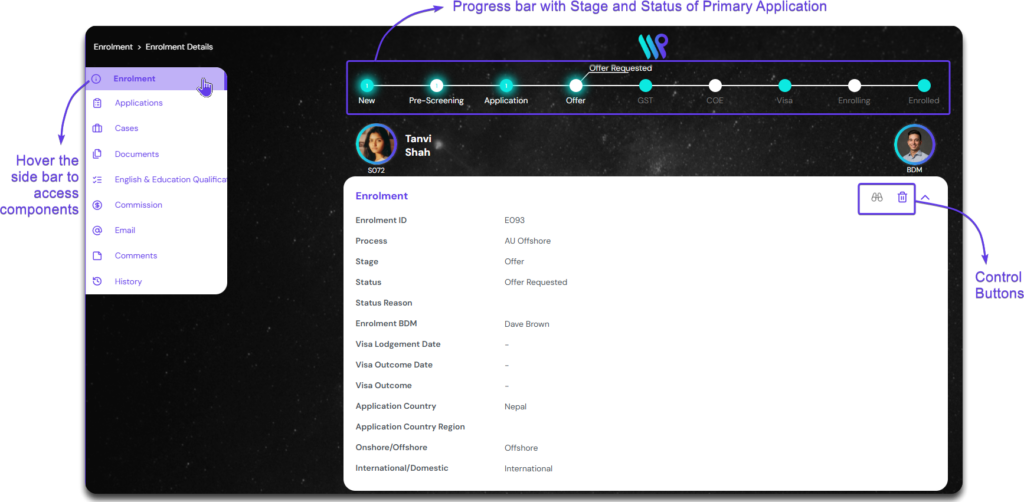
After opening the application record, hover on the side bar to expand and access the components. Click on ‘Enrolment’ to get to the view as below.
The progress bar at the top shows the primary application’s process with various stages and statuses. This is not the process of the enrolment but of the primary application. Refer to Application Process Management on how to change the stage and status of the process. We will also use the control buttons to manage some part of application record.
Below the progress bar, photo bar is visible. You can click on the photo of the student to go to student profile. If a Service Partner is used, you can see Counsellor’s photo and Logo of the Service Partner. Click on it to open up their respective profile.
A different section of the Enrolment record can be seen in a separate section. The first part is the enrolment details. This part has the control buttons on the top right corner. Few fields can be edited here to insert:
Visa Lodgement Date
Visa Outcome Date
Visa Outcome
This section covers the details of the primary application associated within this enrolment. Important information like Commencement Date, Institution’s Student ID are visible here. These are fed from the application record page.
The next part is the Service Partner details this application has been sent from. If the student is a direct student and does not involve a service partner, you will see this section blank as below. Else you will be able to see the details in this section. The photo of the counsellor and logo of the Service Partner will also appear on the photo bar section.
The last part is the system information. This is generated by the system and is not fed by any user. This show information like who created and modified and when was it done. It also show the active or inactive state of the record.
Watch an Application
Watch this enrolment to subscribe to notification of changes and updates of this record.
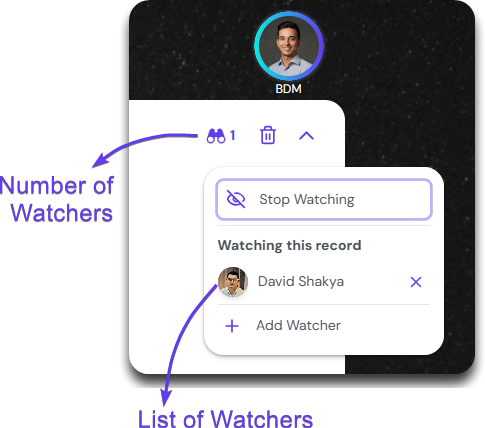
Click on the binocular icon from the Control buttons. Click on ‘Start Watching’, to add yourself as the Watcher of this record.
All the watchers will be listed under “Watching this record”. The number of users watching the record is also displayed next to the binocular icon.
You can add additional watchers to this record by clicking on the ‘Add Watcher’. Type the username in the search bar or use the drop down to select the user you want to add.
Click on the Stop Watching at the top to stop yourself from watching this record. Performing this action will opt you out from any notification being triggered if the record changes.
To remove others, click on the cross icon. They will not be receiving notification for the record any longer.
Deleting a Record
Learn how to delete and retrieve an enrolment record.
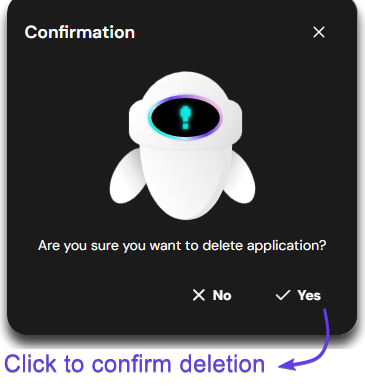
Click on delete icon on the Control Buttons to delete the record
A confirmation pop-up comes appears where you can click ‘Yes’ to confirm. Another pop-up appears to confirm the deletion.
Once deleted it will appear on the Deleted list with a strikethrough.
Also, it will be appearing with the strikethrough on the application pane on the student record as well.
Open the deleted record by clicking on the ID. Click on the Restore button to undo deletion. The record will be moved to previous respective location.