Manage the lead process, change stage and status to stay updated with the most recent action on your student record
The Progress Bar
The progress bar denotes the Stage and Status of the any record that has a process. This has to be enabled and set from the admin console. However, this totally depends on how your company has setup this system. The progress bar is not a mandatory component you have to use. If you company has set up a system for the student record, it will give you a detailed information of the where the student is in the process.
The below illustration is considering that your organization has set up the process for lead record. Also, the process is the default process setup on the system and might defer to one your company has set up. There could be multiple processes set up considering different situations. An assignment rule is set based on the condition so that when the lead is created, right process is automatically selected.
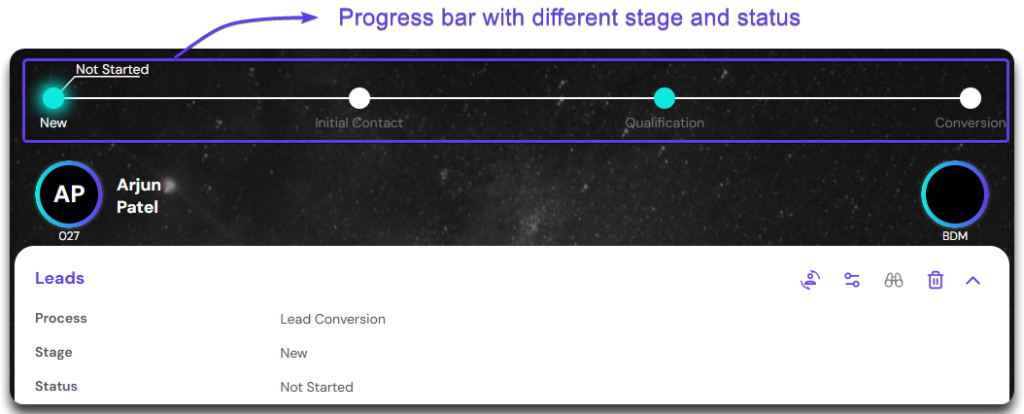
The progress bar can be seen at the top of the lead record. Depending on the assignment rule you have set up, the progress bar should be automatically set.
Change the Lead Process
Change the process of your record in case you have multiple processess.
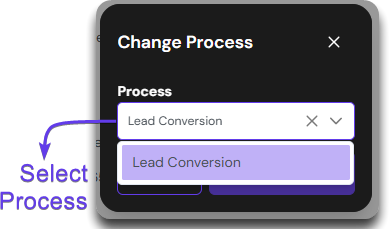
Click on the ‘Change Process’ button on the controls. This icon will be active if you have selected a process for the student record. Else, it will be inactive.
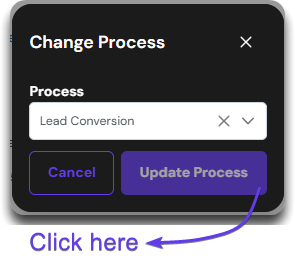
Select the process from the dropdown. The selected one will appear on the field like show on the image.
Click on ‘Update Process’ button. This will change the process, and it will be reflected on the progress bar. If you want to exit, click ‘Cancel’.
The Progress Bar will reflect the stage and the status of the process you have chosen. If there was no progress bar initially, it will appear now.
Changing Status
The progress bar has multiple stages and statuses. Learn how to change it so that you are aware of where you student exactly is in the process.
The Progress bar generally starts with the default Stage like New and status like Not Started. Each Stage will have a start and end date. Once the stage changes, those dates are automatically tracked by the system. The end of the previous stage is the start date of the following stage. Hover over the dot to see the Start and End Date.
The Stage you are on or completed will be shown will the Teel filled color with a glow. The future stages will be appearing in White and Teel without the glow. To change the status, click on the current teel color with the glow. The pop-up appears just below the same stage dot.
On the pop-up window change the status to desired one. If your status has negative connotation, like ‘Declined’, you might need to choose ‘Status Reason’. The status reason could be something like ‘Requirements not met’, or ‘No Show’. Click yes to save changes, no to cancel.
A pop-ups appear to confirm that the status change has been successful, and the student record has been updated.
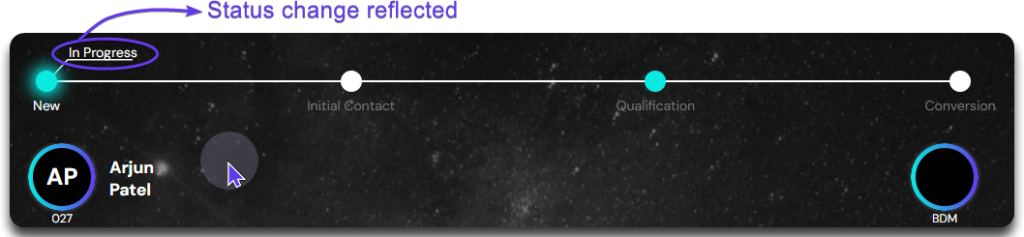
After changing the status, note that it is appearing above the leader line.
Changing Stage
After completion of a milestone, the process has to move to the next stage. See below on how to change the stage.
To move on to the next stage, click on the stage that you want to select. This will generate be the next dot where you cannot see the leader line. Click on it to see the Pop-up.
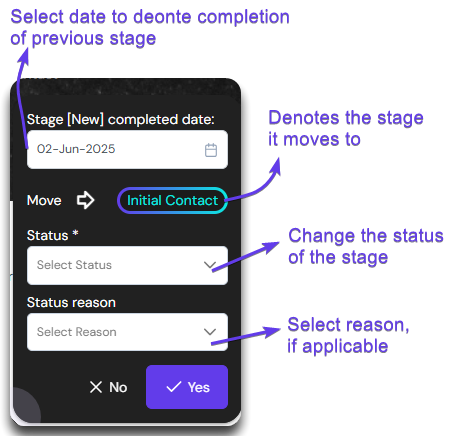
The pop-up window could store a lot of information. The first date field show when the last stage got completed. Next, you will see which stage the process will move into. You can then select the status of the stage. Some status could require reasons. If required, change it accordingly. Reasons are generally applicable in status with negative connotations, like declined and withdrawn.
On the pop-up window that appears, change to the date when the previous stage got completed. Now change the status to appropriate one. The drop down wll list only those appropriate in this stage. These are predefined from the Admin Console. If the reason is required, change it accordingly. Once completed, click on ‘Yes’ to save changes.
A pop-ups appear to confirm that the stage and status change has been successful, and the student record has been updated.
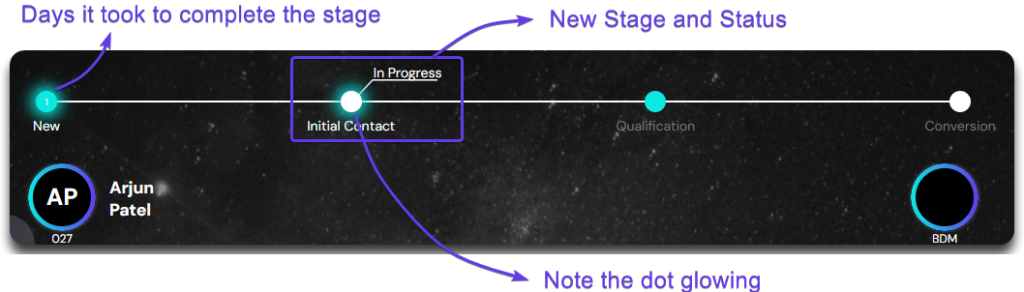
After successfully changing the stage and status the progress bar will look like below. The current and past stages represented by dot have glowing effect. The completed stage shows the number of days taken to complete the stage inside the dot.